Monday, September 23, 2013

Happy Halloween card

Good morning everyone!

I have a card to show you today.

The collage sheet I used is one of Heather Hudson's designs.
I received it as a freebie for being an email follower of her blog.


Cool right?

Here is the card I made.....


I started with a card blank and added a black glitter to the edges.

I printed out a couple collage sets so I could use 3 of the tags side by side.

I edged all of the collage pieces with platinum stickles.


I pop dotted the circles and the sentiment.


Inside I added a smaller version of the candle tag and moon circle, 
that were also edged with platinum stickles.


To see Heather's work her blog is HERE.
Shop at Heather's Etsy store - My Artistic Adventures HERE.

***
I love hearing from all of you so please feel free to leave a comment! 
Thanks for stopping by!


Friday, September 20, 2013

Man-O-Man Happy Birthday

Good morning everyone!

Over at Gecko Galz, this month, we are celebrating 
National Card Making Day
and today is my day!

I made this Birthday card for my brother.....


I started with a blank card and added the background paper from 
the Gatsby Paper collection.

I layered my Gecko Galz collage sheet images ..... 
the Man-O-Man collage sheet,
Time Flies collage sheet 
and 
Ephemera Days collage sheet
on top of a piece of  jute ribbon.

The "Happy Birthday" sentiment piece is from 
Heather Hudson's
Beautiful Framed Women digital collage sheet.

Below is a peek at the inside of the card.....


I simply used a strip of the Gatsby paper I used on the front
 and a clock from the Time Flies collection.

Be sure to stop by Gecko Galz and check out all the other 
DT members card they made for 
National Card Making Day!

Thanks for visiting me here!
Have a wonderful weekend!

Thursday, September 19, 2013

Happy Halloween Tag Exchange

Good morning everyone!

I joined a facebook exchange group and our first swap was a 
Halloween Tag.

The only requirements were that it had to be 
8 1/2 x 4 1/4 and the Halloween theme.

Being on the Gecko Galz Design Team 
and loving the Hocus Pocus Paper pkg I couldn't wait to get started!

So here is my tag.....


I started with a manila folder that I cut down to make the tag then backed it with a heavy card stock to make it really sturdy.

All the papers, 
pumpkin image(Autumn Days collage sheet),
 envelope(Hocus Pocus paper pkg)
 and
 the banners(Vanity Fair paper pkg) that are below the image 
are from Gecko Galz.

I distressed all the edges and inked them with 
walnut stain and black soot distress inks.

I layered the background papers, 
cutting & curling the top bit of the striped paper so I can tuck a piece of the netting ribbon in there.

I got out my diamond mask and some modeling paste that I mixed with black acrylic paint 
and applied that in a couple of areas.

I sprayed my cheese cloth with several sprays...
oranges and black.

From there I started layering everything...
a couple pieces of curled papers,
small envelope with the little tag that I stamped with a Happy Halloween sentiment,
the pumpkin image with banners below
and a couple flowers.


The three Prima wooden house embellishings were inked with 
walnut stain, fired brick and broken china distress inks.
I went around the windows, doors and fence with a white gel pen then re-inked the houses to get a darker color on the houses and make the windows pop more.

The Dusty Attic mini tree was topped with vintage photo distress powder.
Love the texture that gave the tree!


Above you can see a close up of the pumpkin image, rolled paper, 
envelope with the little tag....

Below you can see that the tag is removable so my swap partner can keep the tag around until Thanksgiving if she wants to!


Below is another picture of the full tag.

I shaped the pumpkin hanger with some jewelry wire I found in the $1 bin at Walmart!


I put together a video, of this tag, that you can see here.

It's always wonderful to hear from you so please feel free to leave a comment!

Thanks for stopping by!

Wednesday, September 18, 2013

It's finally painted!

YAY!

It has taken way too long!

It has driven me crazy!

We moved in here two years ago!

With everything else that needed to be done and a couple of illnesses that needed to be dealt with first,
this was put on the back burner.....

 A couple of times!

But I finally did it!

And I am so happy with it!

Here it is.....


Oh wait.....

 I have to show you the before pictures first.....


Ta da!
My 3-green kitchen/dining room


A close up of that lovely pattern on the walls....


My poor, sad looking Christmas decor couldn't hide it!


But it's done now!

I've painted it all!

Big sigh of relief!

This is what it looks like now.....


No more green and cream cabinets!


No more green, gold and cream wallpaper 
(or whatever that was)!


Unable to afford new knobs just yet, 
so I spray painted the old ones!


I still have the olive green stove and sink 
but I can handle that now that I got rid of all the other greens! 

Yup the floors needs help but that will have to wait!

I'm so happy with the way it looks now, 
I can't help but smile when I'm in there!

Thanks for stopping by!

Have a wonderful week!


Monday, September 16, 2013

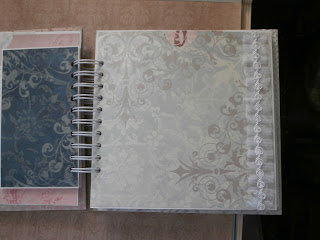
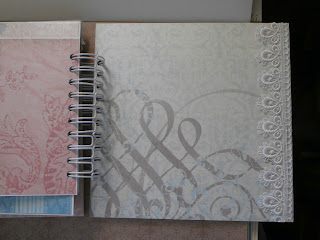
A wedding mini album.....

Good morning everyone!

My mini making roll continues!

This is another request by my daughter.
Her friend was married this summer and she wanted to give her a mini album.


I love the way this cover came out!


I used Just Peachy ultrafine transparent glitter from Art Glitter on the hearts diecut.
 I also entwined the wire to make the rings and added their names!


Every large page has a top pocket.


I added little side pockets for extra tags & photo mats.


How cute are my cake decorations?


Love it!

The bling on the lower right of the page below is a piece I have been holding on to forever!
I've tried to add it to several projects with no success until now!
I think it looks great there, what do you think?


Happy crafty week to you all!

Thanks for stopping by!

Friday, September 13, 2013

Wedding mini album for my son & his bride

Good morning everyone!

(Picture book post......Lots of pictures, less story)

I know I mentioned a few posts ago that my son had gotten married this summer and today I want to show you the mini I had made for them.

Her favorite colors being red and black 
and 
not forgetting that my son's favorite color is blue
I decided to start there.


She is not a girly girl so I did my best not to get to fancy with it
and that was definitely the hardest part!
LOL

The hanging tag mini I thought would be a nice place for those at the wedding to write something to the bride and groom!


Can't see them in the picture but there are little blue gems on the swirls
(had to get blue in there somewhere for my son)!


I love how this dress form came out with the laces & pearls I put on there.....


lot's of pockets and tags


Love this waterfall page!


A mini in a mini.....
with lots of tags inside and out!


There are a lot more pages and a whole bunch of tags hidden in pockets but I'll stop there for now.
If I showed you all the pages you be here forever!
LOL

Thanks for stopping by!

Please feel free to leave a comment, I love hearing from all of you!

Have a great weekend!